You might want to delete the background from an image, but what tool is best for the job?
You could use a full-featured picture editor such as Photoshop or a simple tool you already have, such as Microsoft Word. In this article, we will show you how to remove an image using Word.
Finally, we’ll compare the results to this drag and drop removal tool that’s new on the market: Clickmajic.
There are a variety of reasons why you might want to remove an image’s backdrop.
Perhaps you want to concentrate on a single person or object without being distracted by the surrounding.
Maybe the backdrop colour clashes with the rest of the colours in your paper. Perhaps you want to use Word’s text wrapping features to make the text wrap around the image more tightly. It’s simple to remove the background from an image in Word for any purpose.
Limitations of Microsoft Word for Background Removal
The limitation here is that Word’s picture editing tools aren’t as advanced as those found in Photoshop or other image editing apps. They function well with images that are pretty simple and have a well-defined theme.
The Remove Backdrop tool in Microsoft Word can be used to remove the background from a photograph. Remove an image backdrop to reveal the page background colour, text, or image beneath that portion of the image. Without having to leave Microsoft Word, you may remove the background from clip art and pictures.
The butterfly photos in this example are on a blue-background page of a Microsoft Word document. When you eliminate the white backdrop of each picture, the page’s blue background peeks through.
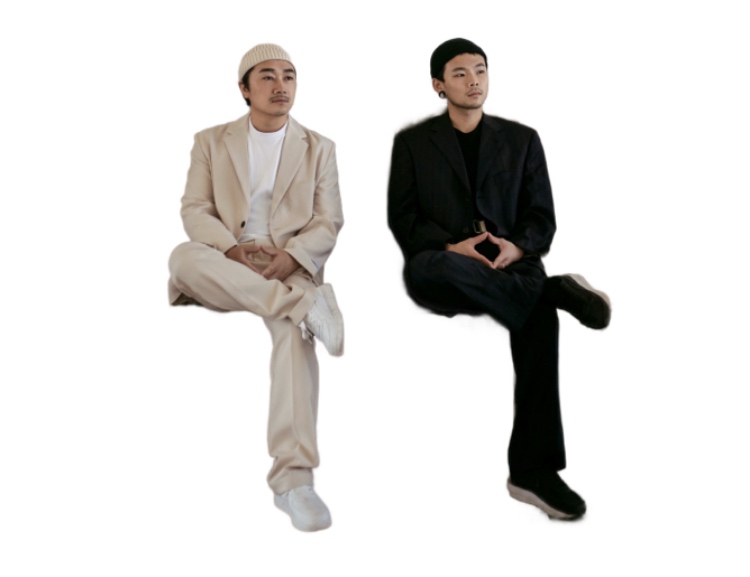
We will be starting with the below image to remove the two people from the background. It’s a challenging image because the person on the left has the same colour beanie as the background:

Step 1: Look for the option to remove the background.
Please select the image from which you wish to remove the background by clicking on it. Select the Format tab from the Picture Tools menu. When a photo is selected, this tab appears. Remove the background by clicking Remove Background.

Step 2: Remove the background.
A bright magenta colour indicates that colour should be eliminated, and place a marquee to help you choose an area. To position, the rectangle around the area of the image that you want to preserve intact, click and drag the white handles of the marquee.
Make sure the rectangle contains all of the image’s desired elements. Press Enter or click Keep Changes. This removes only the white background of the blue butterfly image.

Step 3: Make minor adjustments to the details.
Unless you mark such regions as areas to remain when the colour you want to remove also occurs within the image, they are eliminated along with the backdrop.
If not indicated, it will eliminate them, and the blue backdrop shows through. To manage the removal details, use the Mark Areas to Keep or Mark Areas to Remove options on the Background Removal tab.
A pencil icon displays when you click Highlight Areas to Keep. To keep the original colour of any region designated magenta in the image, use the pencil to click on it. A small plus symbol suggests areas that should be kept, while a minus symbol shows sections that should be removed.
To erase a mark, click Delete Mark. To resume the region selection process, select Discard All Changes. To finish the procedure, press Enter or click Keep Changes.
Step 4: Provide a Comprehensive Background
You can still use the Remove Background tool if the image has an ornate background rather than a single plain colour. A portion of a photograph can split from the rest of the image. The ease with which you can remove the backdrop relies on the photograph’s composition and the part you wish to isolate.
To get the most excellent results, wrap the marquee as tightly as possible around the area you wish to save. To fine-tune your selection, use the Mark Areas to Keep and Mark Areas to Remove buttons. More comprehensive editing may be required for more detailed photos.
Step 5: Examine the Results
Here you can see the results of using Microsoft Word for image background removal. This has not been edited further, as we wanted to show how your image would likely look.
When you’re finished, have a look at the image. Look for places that were accidentally eliminated. To go back, select Undo from the Edit menu or press Ctrl-Z.
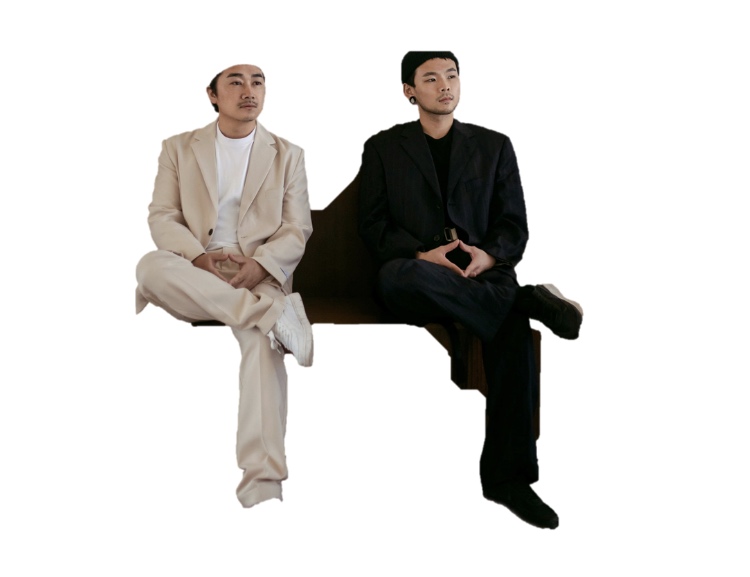
Results compared to Clickmajic
The problem that Microsoft Word had was that the person beanie was cut off and part of the shoes were missing. Also, the brown bench was not removed.
Clickmajic did a much better job while saving time in the process due to its drag and drop feature.